Showing posts with label Michelle Logan. Show all posts

Saturday, 12 August 2017

"Mini Watercolour Booklet" using the Artified Mixed Media Kit.


Hi everyone Michelle back with a little tutorial using the fabulous Watercolour Mixed Media Kit for August. This kit is an awesome idea if you are just starting out with Mixed media or if you wish to add to your stash. The kit can be used on its own or in combination with any other supplies you have.


Today I will show you how to make a mini book using just the supplies in the kit alone.
I have also made more embellished little gems using bits and pieces from my stash just to give you all an idea of what you can create with this technique and kit as a base.
I did have plans to prepare a process video for you all but I had a few technical issues (I am not really tech savvy....sorry), so that is now delayed, but it will happen I promise!
So as a plan B i took some quick pics with my phone so I apologise for the quality but I am sure you will all get the idea!
Here is what I created with just the kit:

 The front and back covers.
The pages inside.


So what are we waiting for lets get started!

  • First, I wet the watercolour paper using a spray bottle and activated the watercolours I wanted to use. Then using the water brush I splashed away all over the page and watched the magic of watercolours happen, adding water where I wanted the colour to move. Just be careful to use colours that do not create mud ie: colours opposite each other on the colour wheel. 

  • While the page is still wet I used the Gold Marabu Spray (which is just a must have in your stash.....just sayin') using the sprayer from the bottle and also actual spraying. This gives the page a gorgeous shine and mixes with the watercolours brilliantly and also in a beautiful random manner.

  • Once dry I activated the black watercolour and splashed it around the page once again using the water brush. Then dry completely.

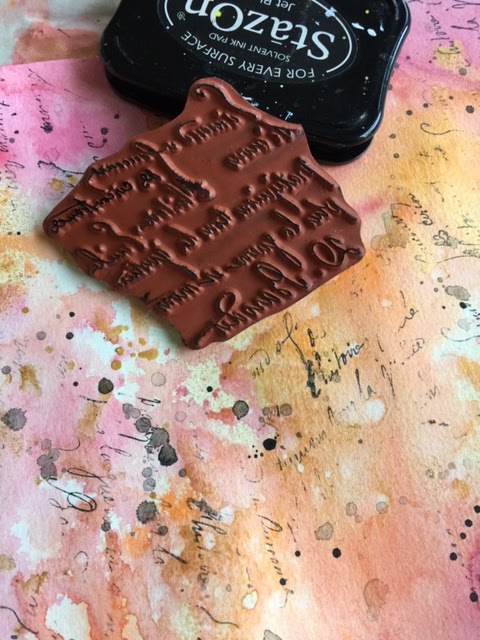

  •  Next I used the stamp with a Black Stazon ink pad randomly across the entire page. It looks very busy at this stage but never fear, in small pieces the book will look awesome! 

  • Now to the folding of the book, I shall do my best to explain. With the "patterned" side down fold the paper in half width ways, be sure to really make each fold edge to edge, and make the fold flat by rubbing a hard edge across it, like the handle of scissors or a metal ruler.


  • Take the open top and fold to the folded edge then turn over and do the same with the other side.


  •  You end up with a page that is a "W".


  • Now fold the page in half lengthwise, now you have one page folded so that it is sectioned into eighths. 


  • Refold the page in half following the width ways fold line.
  •  Then cut the page from the folded edge to the centre, so that you now have a cut in the centre of your page when you flatten it out. 
  • Now to fold the book! Fold the page lengthways then move the ends towards each other to make a star shape


  •  Then fold into the book, easy peasy!


  •  The book is now ready to decorate and look how fabulous all the colour looks!

Page1

  •  You can glue the pages into place or use washi tape to seal them together and make it decorative.

Page 2

Last page

Back cover

  • I ripped the vintage book page supplied and used it throughout the book as the start of embellishing the book pages and to form a spine. 


  •  Now time to play with the Stencil. I used the Ink pad and a make up sponge to decorate throughout and on the covers.


And we are done! You can make these books as detailed as you like or as simple as you please, and the best part? No sewing and using only one sheet of paper!


Here are few others I have made using the kit as a basic kit and adding my stash to get a few different looks.


Well that is about it from me for this month, head over to the Artified shop and get yourself a kit and have a play!
And why not show us what you have created with your kit on the new Facebook site
  "Artified's Mixed Media Creations Hub" would love to see what you do!
Till next time my Lovelies, 

Michelle xxx


Friday, 26 May 2017

"Nature is ...." an Art Journal

Hello everyone!
Michelle back at you with an art journal that resulted from a play session I had with the new Acrylic Art Sprays by Marabu
These are the fab sprays Donna Downey discovered and showed us all on her youtube channel.
Well, after having a play myself can I just say......YOU HAVE TO HAVE THEM ALL!!!!!

How many times have you sprayed a background that you love with  Dylusions Sprays, or even to a lesser extent Lindy's, and then find, when you want to add another medium or layer, the effect is lost due to the water soluble nature of the sprays? 
They just keep moving when sometimes you just do not want them to! 
Well behold, here is the answer ..... Marabu Art Sprays! 

Now, please do not get me wrong, I love My Lindy's and these sprays will not replace them in my art supply arsenal, but they do complement the other sprays as their properties react totally different. 
Basically, the Marabu Art Sprays, once dry, do not move, yes they are permanent!
So for background creation they are just perfect!
 Enough of my carry on, here is the page I created after going nuts with all the colour goodness:

 Here is how I went about my little experiment.

I randomly sprayed through a variety of stencils that I just happened to have on my desk, 
there was no plan and I literally just slapped them all on "willy-nilly" (Oh dear I am starting to sound like my Mother). 
I stuck with a cool colour palette. When the sprays are wet they merge and blend together beautifully, just the way the other sprays do (and what we love them for!).  The colours are so vibrant and they spray with a fine mist that has lovely coverage, so they will go a long way. 
The difference comes into play when they are dry, they do not react any further. 
So lets test that out shall we?

 
Once the first layer was dry I added more colours, (colours that would turn to "mud" if they were reactive),
and looky here, they stayed put and behaved themselves!
I just kept adding more colours till I had a right royal mess really, as I wanted this background to become an underpainting to really test the permanence out.

 
Ok now I have to tell you "GET THE GOLD"! 
When you first spray with this metallic colour it is a "milky" mess but on drying.....OH MY!!! 
It is just glorious! 
So here is the state of the page I ended up with.... I know right, sooooo busy!
So lets get it covered a little and really test these babies out!


I sketched a feather shape, then outlined it with a Fineline needle tip bottle, filled with White Acrylic Paint and Flow Medium, to one side of my page. This will become my focal point on the page.....eventually!

 With white acrylic paint or you could even use Gesso, I covered the background around the edges of the feather so that it highlighted the shape, popping it forward out of the background. 
 The sprays worked perfectly, none of the colour seeped through. If you did this with Dylusions spray underneath you would get colour coming through and tinting the white paint. 


I only added a light layer of white as I still wanted some of the background to show through.

 I pulled some of the white back through a stencil with a baby wipe as I still wanted to test the permanence out and it still did not move with the water on the wipe....YAY!


So here is the page so far, I felt I wanted the feather to pop more so out comes some metallic paint!

 
I gave the feather a few more outlines to make it pop more and also a bit of scribble writing up the side.


Now I am almost done, thanks for sticking with me!

 
All that needs doing is a title or quote, and for this I used alpha stamps and Black Stazon ink.
As I do not trust myself to stamp straight on my page perfectly I cheat a little and stamp my quote onto tissue or greaseproof paper then use Gel Medium to adhere it to my page. The tissue dries transparent so works well.


After the Gel Medium dried I added a few spots of the metallic paint and my page was done!

So, how would you use these with other water reactive sprays? The answer here is fairly simple, I would use the Marabu sprays as my initial layers, then add Lindy's towards the end to add a little shimmer or sparkle, as the acrylic sprays (apart from the metallic colours) are a flat but vibrant colour. 
I am sure with a few more play sessions with these bottles of goodness I will find loads of alternative uses, and I am not packing away my favourite Lindy's Sprays, I am going to play with both! 
Why? 
Because I hoard and I can! LOL
One last look at the finished page:

And a few detail shots:
So that is it from me hope you get your hands on some of the sprays they have been flying off the shelves as soon as they arrived!
Here is where you will find them in the Artified shop: Marabu Art Sprays
Thanks for dropping by, see you next month!

Michelle